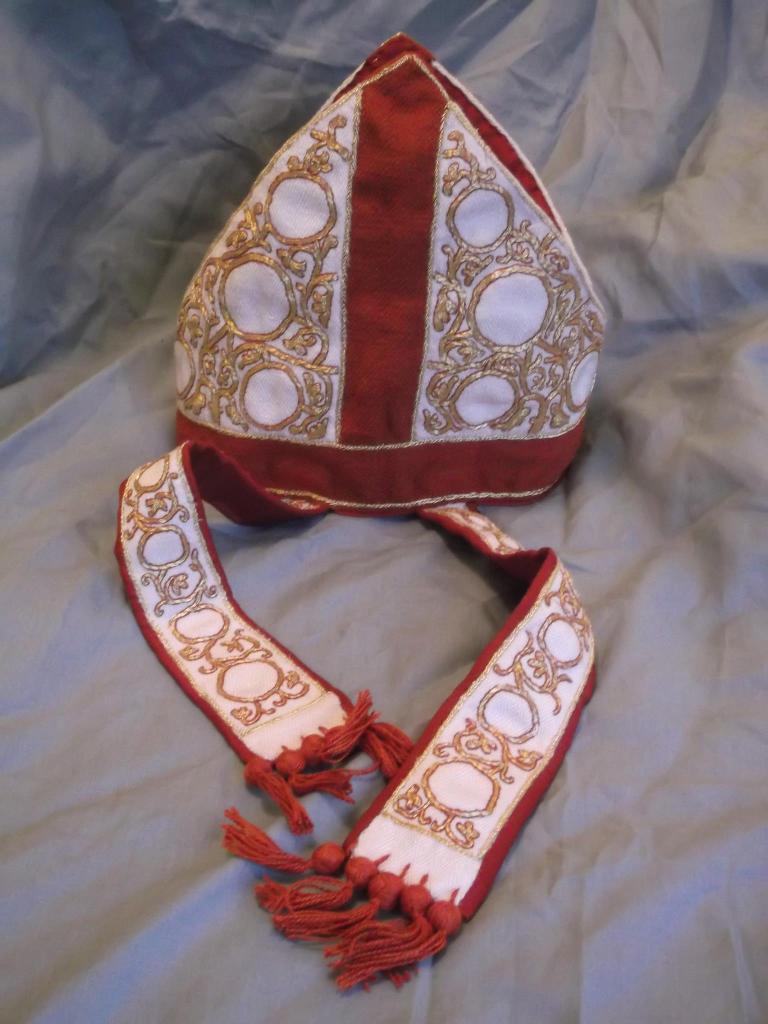
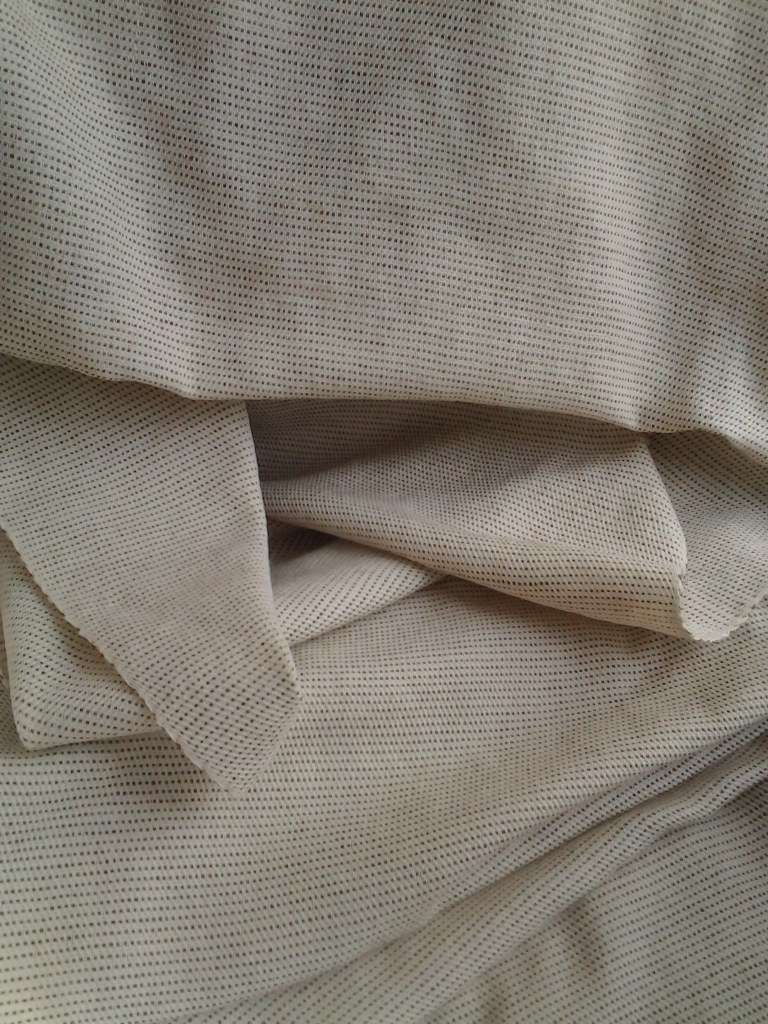
Welcome to the April edition of Early Medieval (mostly) Textiles. This month we move away from the research of Viking Age textiles to the art of re-creating early medieval textiles based on archaeological finds. Elizabeth de Born (Liz) is an experienced weaver and tablet-weaver who has made a number of textiles for my own projects including the St Cuthbert Maniple Recreation Project and a two-tone broken diamond wool twill based find SH9 from the Ship Burial at Sutton Hoo. Here she discusses the working process of creating historically accurate textiles.
Elizabeth De’Born is a UK artist working with pastels and natural pigments. She also specialises in early period textiles (pre-1300AD), predominantly in the field of narrow wares (tablet weaving) and fabric.
1. When we first discussed you weaving the silk ground fabric for the Cuthbert Recreation Project, I gave you technical information such as number of threads per inch, openness of weave etc. What does this actually tell you about the thread you need for the weaving process? I know it’s not simply how many threads were used.
It told me it was a fine, light weight fabric. The thread count gave an idea of the right yarn thickness to go to but the openness of the weave would be trickier – how open was suitable without the integrity of the fabric being compromised. It needed to be strong enough to be embroidered on in the right way
2. When you first explored thread for weaving the fabric you sampled a number of different types. What were these? What were you looking for in each one? How did you know when you had the right one?
The number of threads in the warp and the weft will give a good indication of yarn thickness, however by sampling the weaving (weaving a small quantity, I like to do squares so if they are washed the shrinkage can also be calculated) the accuracy is increased. I often start with one I’m pretty sure isn’t really suitable – more for a base line – then work through the other yarns that are more likely to work. Each sample then can be assessed for yarn count and suitability to the task required – so even if a yarn produces the right count, the weave may end up being too close or dense which then rules it out for the job it’s required to do.
Since in the most part I’m using commercially spun threads it does tend to limit the yarn thickness available which does mean that compromises may need to be made. Essentially the right yarn is the one that ticks as many of the boxes as closely as possible.
3. How do the fibre’s properties affect the weaving process and your approach to working with it?
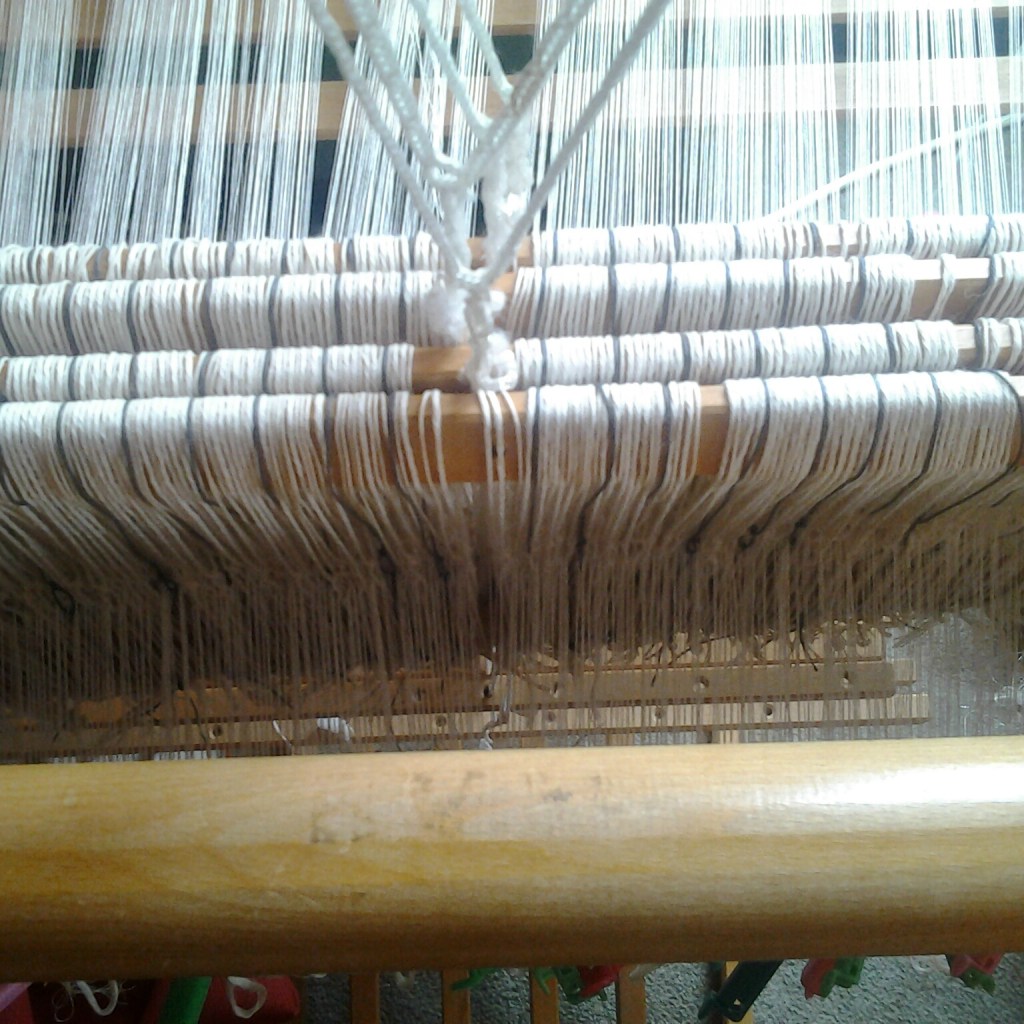
If it is fine, flyaway, sticky, high twist, I’d need to consider sizing, starching or using a de-tangler to make weaving easier. It will control the type of loom I’m working on to a certain extent, the reed (number of dents needed), how I’d put the yarn on the loom (dress the loom) – do I work front to back or back to front or even a hybrid of the two.
4. What sort of loom did you use to weave the silk and why? Why was this the better loom compared to say, a warp weighted loom?
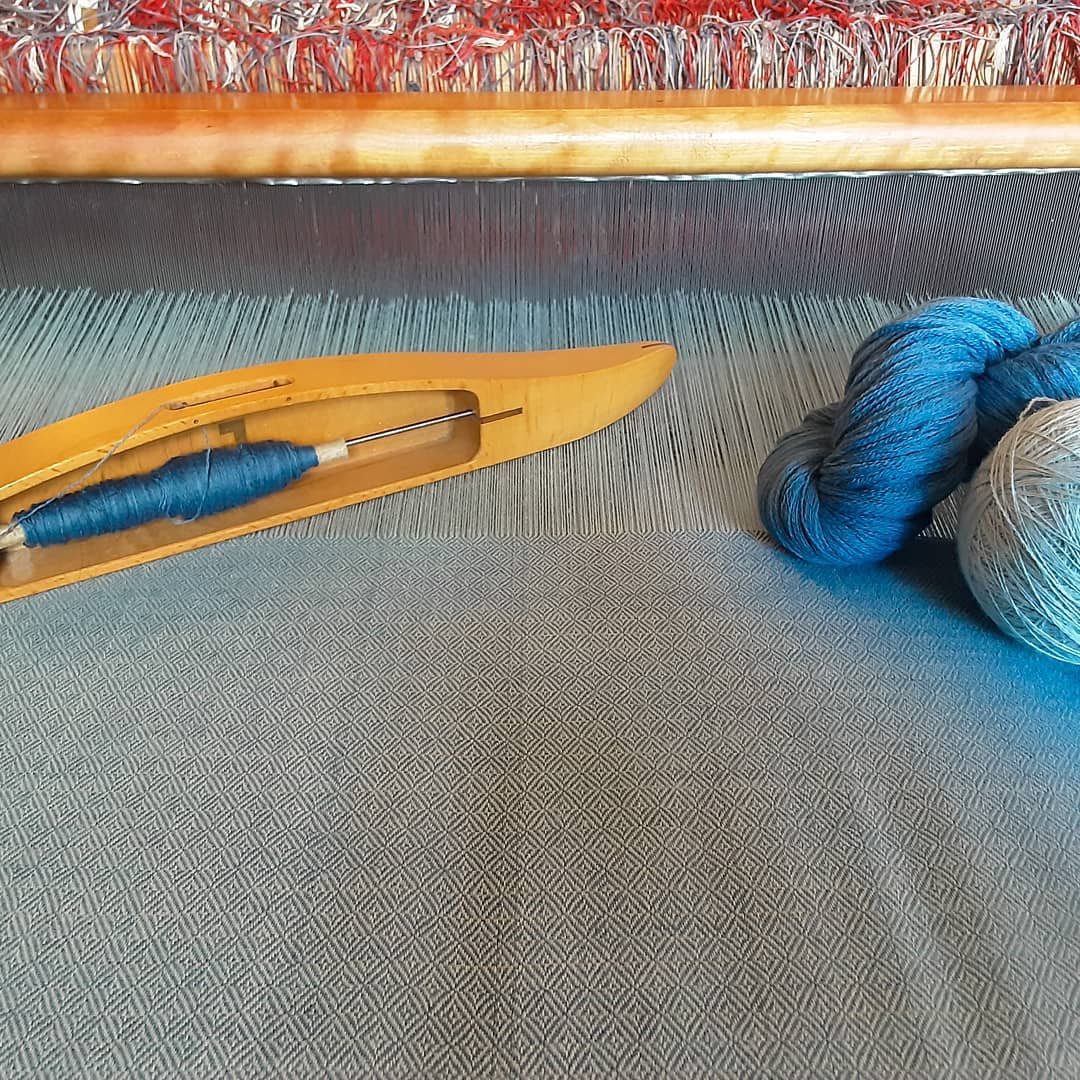
I have two floor looms one is a counterbalance and one is a countermarche – there are differences between them but in both when the a treadle goes down, the shafts go up AND down so there is even tension on all the threads. One is used for primarily wool – it’s a big heavy loom with the beater being hinged from the bottom giving it some weight behind the movement. The smaller loom which I tend to only use for silk or linen has the beater hinged at the top and hangs free making it lighter – the only weight is what the weaver uses to beat the weft in, ideal if the need for an open weave is called for.
Warp weighted looms have a lot of versatility in simple construction, size and overall footprint but the do require a lot of effort on the part of the weaver, the weaving is beaten upwards manually (with a weaving sword/stick or just a hand) as opposed to a horizontal loom where the beater is pulled towards the weaver, it can be slow and is definitely physically demanding particularly on the shoulders if you are short. Much of the resulting fabric will be down to the skill of the weaver – how evenly can they beat, how well they can maintain the width down the length with or without assistance etc
I wouldn’t say the floor looms are always better than a warp weighted looms – they are certainly quicker (and easier on the shoulders) which is why the horizontal loom took over from the warp weighted one. Production of fabric could be increased meaning it was possible to earn a living from weaving – this didn’t mean the use of a warp weighted looms ended. Each one has pros and cons and in some cases where using a yarn that may need a light touch or irregular tensioning, a warp weighted may be the best for the job. Admittedly I’d pick a counterbalance over a warp weighted every time.
5. What are the processes preparing the thread and setting the loom and how long did it take?
Did you encounter any difficulties and how did you overcome them?
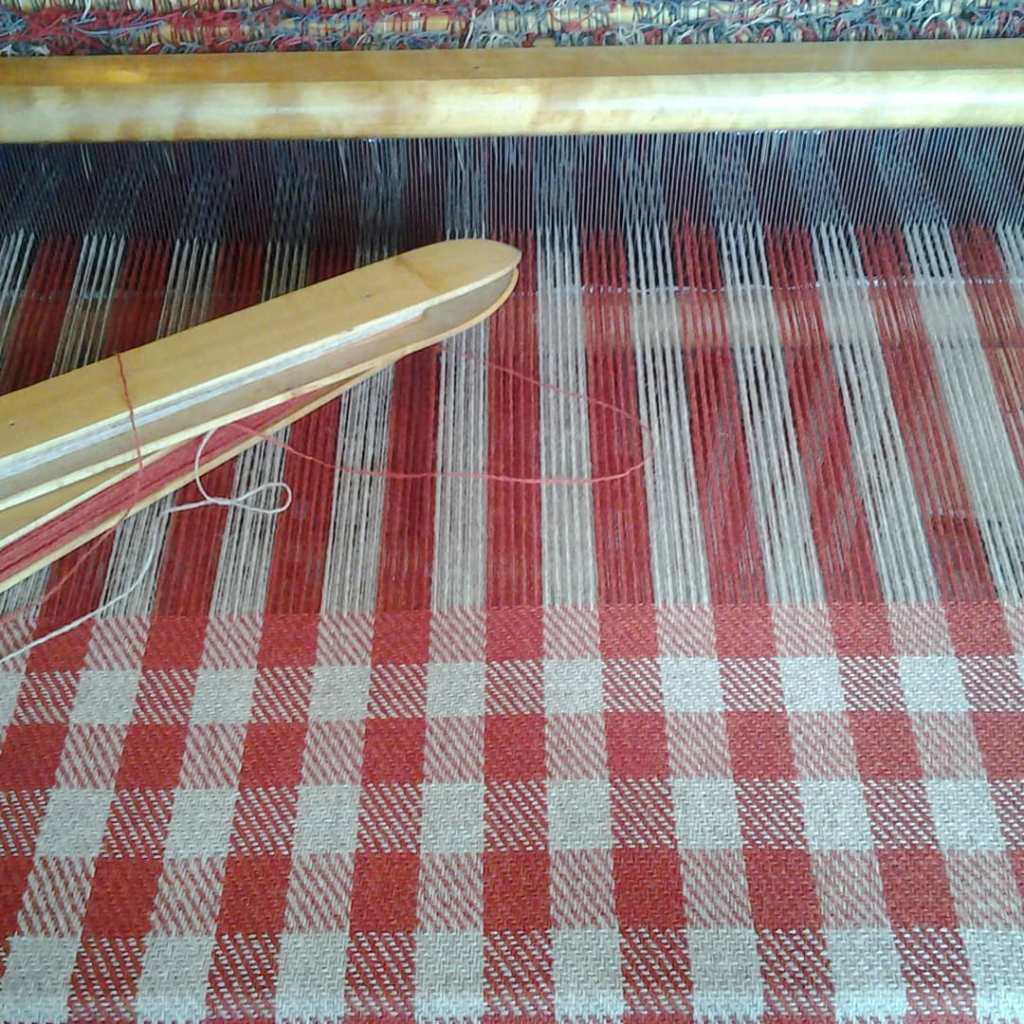
How long is a piece of yarn? Dressing the loom will take differing amounts of time if considering the variables – how delicate is the yarn; how wide is the weaving; what are your epi/epc (ends per inch/ends per cm); does it need dying or sizing; how long should the finished piece be. Looking at two pieces: the St Cuthbert silk, a 50cm width and the Sutton Hoo fabric, a 67cm width, for comparison. The St Cuthbert fabric used a very fine silk that needed to be put on the loom in one go and took in total 8 hours to get a 2m length to the point it was ready to weave – this will include checking threading etc. The Sutton Hoo fabric, which is in wool threaded to a broken diamond pattern, not as fine nor as high a thread count took 6 hours to get a 10m plus length to the same point.

6. Can you explain the weaving process and the decisions you made?
For the silk piece the epc in both the warp and weft were known, so was the resulting look to the fabric. It was also a tabby/plain weave (that’s one thread up and one thread down) – so far so simple. But…yes, the but…. It’s a fine yarn, 2/200nm (that’s 100m per gram), flyaway at the slightest draught and tangles if you take your eyes off it. Oh and it snaps really easily.
So, decision one: use a direct tie up on the loom – not the quickest way to weave a tabby but it does mean that I can move each shaft up independently if required. The second was: The choice of putting four threads through each reed dent. In combination with the tie up this means I had a visually quick way of finding and isolating the broken thread – each shaft could be lifted at a time and only one thread should be visible in the dent. Given the yarn being worked, this was the most obvious way to reduce problems later.
Decision three: not to size (to cover threads with a protective layer before weaving), would have preferred to do this but didn’t have the right equipment for such fine yarn and I wasn’t 100 percent certain it wouldn’t cause problems with the end use (also there is no evidence it was done on the original). So lots of de-tangler to stop the threads from sticking – this wears off quickly when handled.
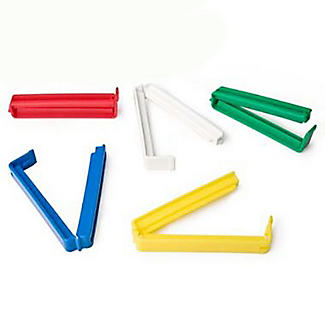
Fourth decision: warp back to front in very, very small batches and short (no more than 2m) lengths, oh and use Klippets (plastic clips for keeping bags closed) at every stage to keep control of the batch (I love Klippets). There were other decisions from leaving broken ends exposed rather than cross them over in the weft/warp as I though it may confuse the count when embroidering; how much tea was I likely to need per day; bulk buying mint crumbles/de-tangler/Klippets, but they are minor ones.

The end user hopefully got the fabric they needed to do the job-J
7. I know we sent samples back and forth to test, can you explain how did the collaborative process help in producing the yarn?
The end user hopefully got the fabric they needed to do the job

8. Do you work collaboratively much? What are the pros and cons of this sort of approach?
Quite often. Although I’d say it’s more for tablet weaving than fabric at the moment. The process can be broken up into two parts: the details (or lack of) for a particular find/project and the requirements of the end user.
Reproducing a find isn’t always as straightforward as the St Cuthbert silk. Bare essentials for fabric reproduction will be a way of determining thread count and knowing what the weave is. For tablet weaving it would be a photograph/diagram and dimensions of find. Sometimes the write up will give the ends per inch or ends per cm as well as the weft count, however a good photograph with accurate measurements will do at a push. Knowing the weave is essential – this is where variations in description come in (I have an entire album on facebook dedicated to period weaves and the different names they are given: https://www.facebook.com/media/set/?vanity=148588911840817&set=a.689310191102017), which may often mean that some detective work is needed to make sure the right weave is woven. A diagram or clear photo is really helpful here, especially where the textile may be a less basic weave like broken diamond twill (also called diamond twill). Quite often though, the report will give the number of threads in each block so totally workable without further information. Of course, the very best will have a description, thread count, diagram, photo with measurements and (especially if working out tablet weave or embroidery) a photo of the back.
If the end user knows what they want and how the work is going to be used for, this will speed up the process. The work has to be functional for the end use, which is important if there is limited information on the piece being reproduced. Period accuracy in terms of colour also has to be taken into account as well as available budget. Time has to also be considered – some items are relatively quick in hand weaving terms; others will require a longer conversation and samples being sent.
9. When weaving do you follow ‘set’ ideas or do you find that you develop your own ‘ways’? How do these differ and why?
I tell my art students that they do need to know and have a good grounding in the principles before developing their own styles, much the same can be said of weaving. Successful short cuts or innovation comes from knowing how the yarn is likely to behave in a given situation – a lot of this comes with experience. Testing/sampling just means that you are more likely to have success in the project if you’ve worked out the potential pitfalls or at least have a plan for tackling them. What I would choose to do from dying the yarn through to weaving will depend on the yarn used and the result needed. Unfortunately, a lot of this will come from practice and failure – each one is a learning experience not a disaster.
10. For anyone interested in learning to weave or wanting to learn more about it, how would you advise them to go about it?
The Weavers, Spinners and Dyers Guild is a great place to start https://www.wsd.org.uk. YouTube has quite a lot of tutorials (will depend on what type of weaving you want to do) and there are some great books:
Weaving – loom
Deborah Chandler – Learning to Weave and Learning to Warp (this is covered in the first book)
Ann Sutton – The Structure of Weaving
Linda Ligon – The Weaver’s Companion
Anne Dixon – The Handweavers Pattern Directory
Laila Lundell/Elisabeth Windesjo – The Big Book of Weaving
Peter Collingwood – Techniques of Rug Weaving
Tablet Weaving
Peter Collingwood – The Techniques of Tablet Weaving (the bible of tablet weaving, it can be hard going for absolute beginners)
Archaeological – lots to choose from so picked three that I use the most…..at the moment
Lise Bender Jorgenson – North European Textiles until AD1000 (and any of the other NESAT’s)
Margrethe Hald – Ancient Danish Textiles from Bogs and Burials
Elisabeth Crowfoot/Frances Pritchard/Kay Staniland – Textiles and Clothing 1150-1450: Finds from Medieval Excavations in London
I would like to thank Liz for her insights into weaving historically accurate fabrics and the collaborative working process. Next month Emma Boast is going to talk to us about Nalbinding.
Contact: If you would like to contact Liz about her work, please use one of the links below:
Facebook: https://www.facebook.com/Elisabeth-DaBorn-Art-and-Textiles-148588911840817
Instagram: https://www.instagram.com/art.and.textiles

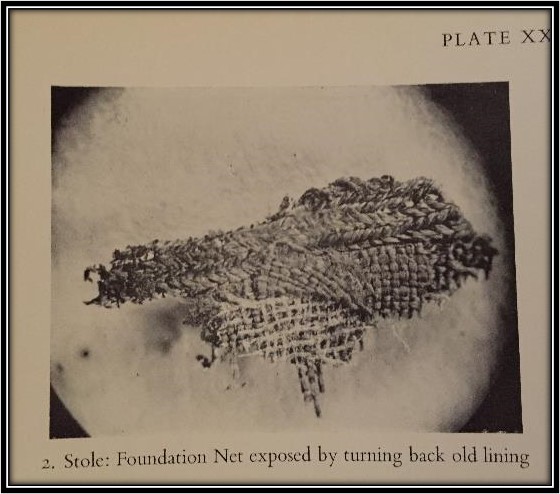
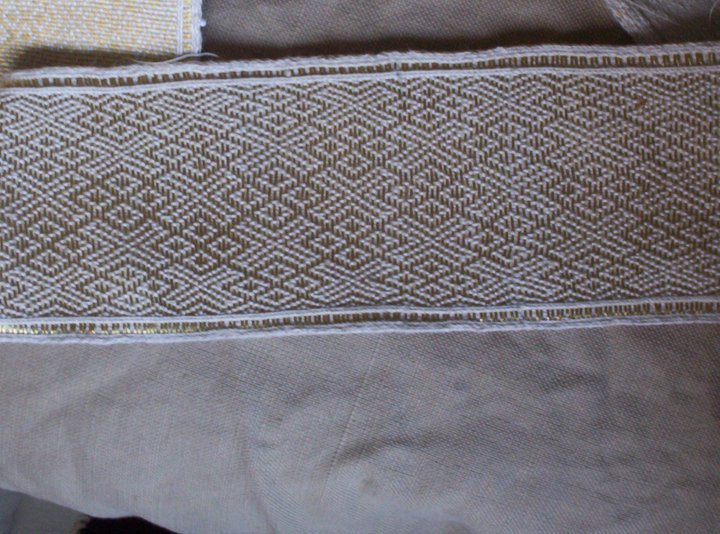
The picture from Battiscombe seems to show that the tablet-woven band was woven at the same time as the other fabric, the same warp thread serving for both textiles. I say this because I do not see any obvious whip stitching in the photo which would indicate that the band was attached to the fabric after it was woven. Can you please tell me if that is what I am seeing or whether there is something else going on? Thank you.
LikeLike
It’s funny you ask about this. I’ve been meaning to emailing you about it but just haven’t got round to it yet.
I’ve just re-looked at the analysis in Battiscombe, just to double check, and nothing is mentioned about how the band was attached to the stole, in this photo, or the maniple or probable ribbons.
I was thinking along the same lines as you and that’s what I wanted to talk to you about, as well as as couple do other things. Let’s email each other to discuss it in more detail. You’ve got my email address haven’t you?
LikeLike